WebMail
  LiveChat
  Support
How to Build Shopping Cart Website
In this article, we have listed out few open source and free e-commerce platforms and given a detailed description and setup of the best one among them, with which you can easily build your own online shopping cart without coding.
List of open source online shopping cart platforms:
1. OpenCart –
Designed feature rich, easy to use, search engine friendly and with a visually appealing interface. It is a robust e-commerce solution for internet merchants with the ability to create their own online business. OpenCart has a very intuitive admin interface that allows you to have complete control over your shopping store.
2. AgoraCart –
Customizable and secure open source e-commerce shopping cart that you can install on an existing website. With AgoraCart, you can expect the typical features such as customizable templates for setting up your store, support for different product categories, options for different tax rates in addition to back-end store management tools. On the upscale side of e-commerce, AgoraCart is PA-DSS Complaint (PCI-DSS) and supports more than 10 payment gateways.
3. Magento –
Used by more than 240,000 merchants worldwide. Magento’s eCommerce platform gives you the tools you need to attract more prospects, sell more products, and make more money. It is supported by a global ecosystem of solution partners and third-party developers. Acquired by eBay in 2011, Magento is part of eBay’s X.commerce business unit. Magento e-commerce gives merchants scalability and features for presentation, content and functionality. The platform offers marketing tools, search engine optimization, product catalog management and browsing, one-page checkout and a number of standard tools such as those used to manage shipping, tax and customer service.
4. osCommerce –
A free offering that comes with features and tools to help store owners manage the front-end catalog and back-end administration. Provides a basic template layout structure to customize the catalog front-end. The Administration Tool lets merchants configure the online store, insert products for sale, manage customers and process orders. There is a large community of more than 256,000 store owners, developers, service providers and enthusiasts contributing to the help, support and development of osCommerce.
5. PrestaShop –
A customizable, PCI-DSS compliant, e-commerce solution that will handle everything from Web store set-up to managing customers and orders. Store owners can create and manage the front-end catalog and marketing, customize orders and change shipping options and localization to suit their business. It is available in multiple languages.
6. Zeus Cart –
An incredibly stable & richly-interfaced, open source shopping cart and it’s a simple E-commerce software package which allows, even a non-technical person to open an online store on the Internet, with minimal efforts. The cart is primarily for small and medium store owners and offers inventory management, attribute-driven product catalog, category management, a built-in CMS and SEO-friendly URLs. Standard features such as discounts, taxation, shipping options, integration with multiple payment gateways and email templates are also included.
You see there are plenty of open source and ready to use solution available for you to get started selling your product online. As we always do, we pick up the best one from the list and help you set that up. From the above-given list, the best one according to us, based on various degree (User Experience, Management, Features) of analysis is OpenCart. Rest of the article will now help you setup openCart for your store which will be ready to go live. Let’s begin –
Step-by-step guide to building eCommerce website:
1. Setting up Development Environment
OpenCart needs a PHP development environment with MySQL as its back-end. Follow this post to set up the required environment: How to Build Your Own Social Networking Website.
2. Installing OpenCart
Download the latest OpenCart software from here. Extract the downloaded zip file.
When opening the zip file, the following files will be visible:
- “upload” folder
- “license.txt” file
- “readme.txt” file
The “upload” folder contains all the files needed to upload OpenCart to a web server. The “license.txt” file contains the license agreement regarding the use of OpenCart on your site. The “readme.text” file provides links to the current install and upgrade instructions on the OpenCart website.

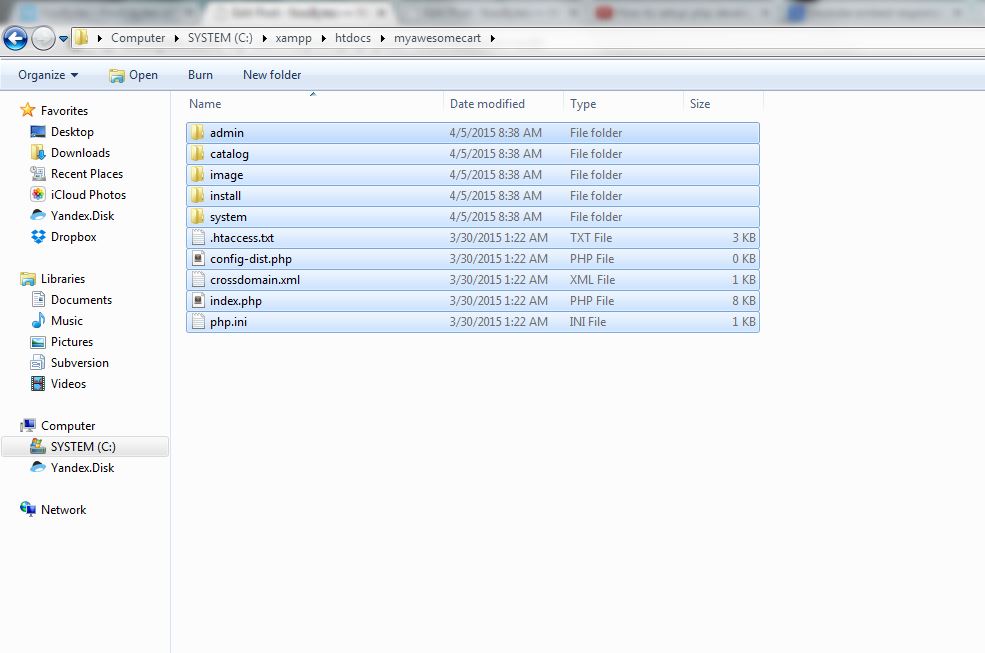
Go to your XAMPP/htdocs directory and create a folder, name it to your desired shopping cart e.g. myawesomecart and move all “upload” folder contents here.
Now go to your browser and type http://localhost/myawesomecart, you will see following page –
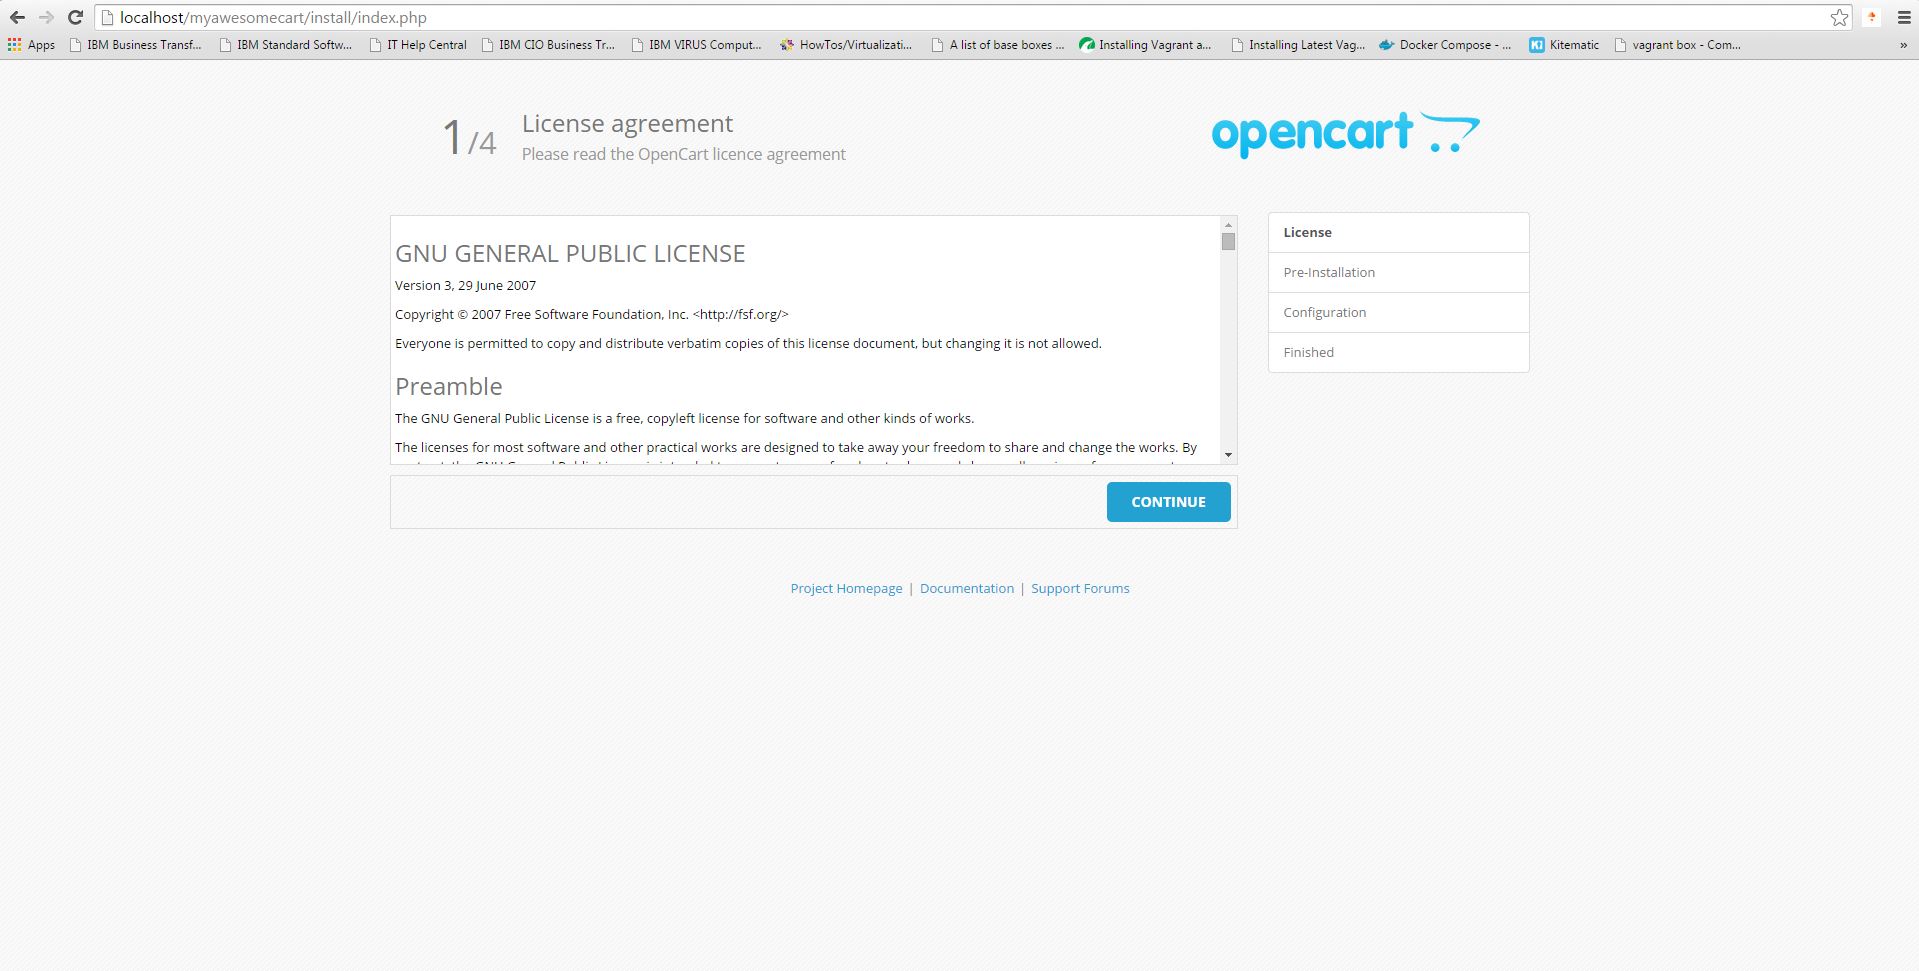
Step 1: License –
Accept the license and click continue.
Step 2: Pre-Installation –
Check your server is set-up correctly. You will something similar to following

You will see that there are 2 files which it says are missing. These files are present in the upload folder but the names are not as per installation requirement. Rename these files in myawesomecart root folder and admin folder.

Refresh the browser windows and you will see everything is fine. Click on continue.
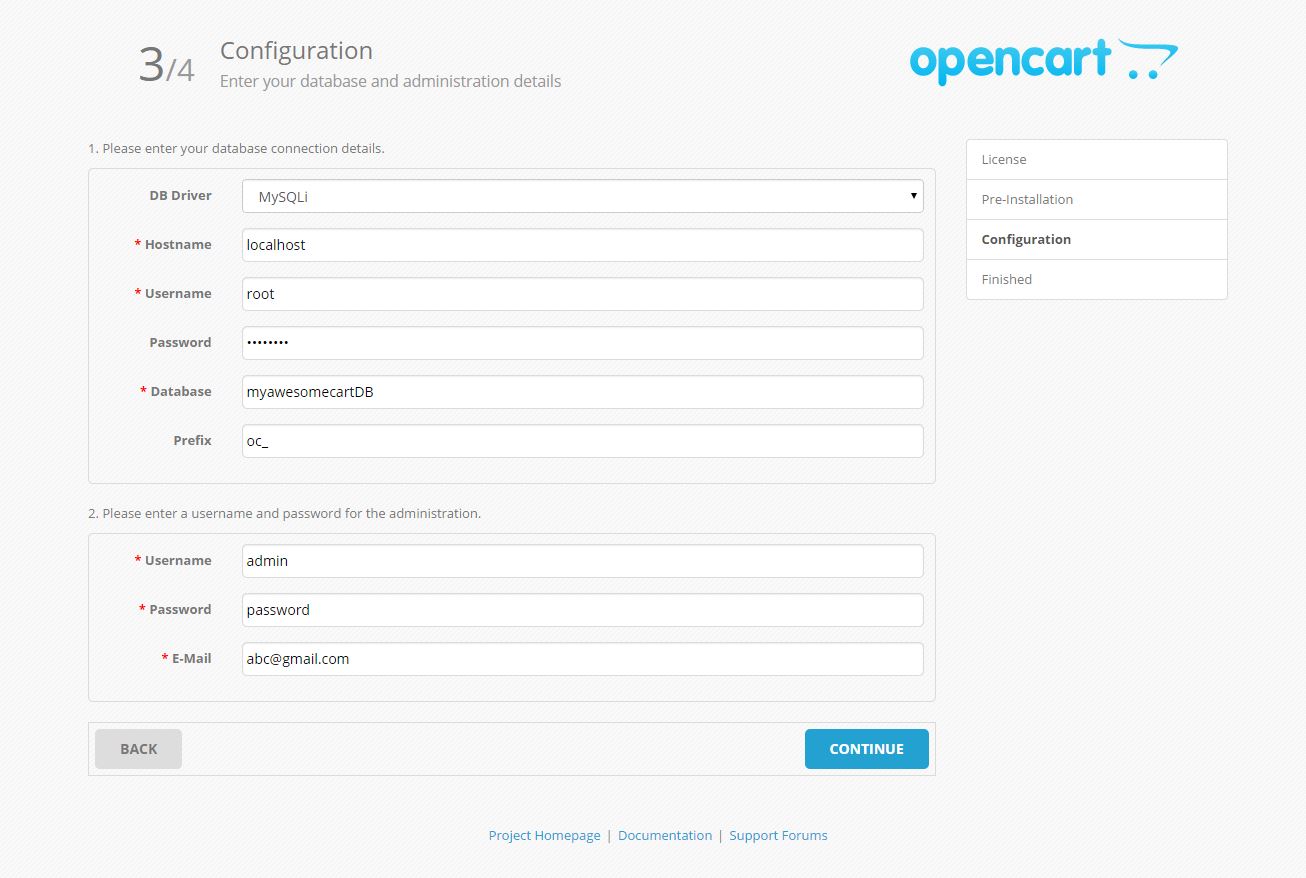
4. OpenCart Configuration –
In this step, we will step you will setup your database and administration details. If you have followed the above video for setting up PHP development environment you would have already done your MySQL setup. Now go to phpMyAdmin console and create a database for your shopping cart –

Enter the database name you just created and database credentials in database connection details. Also fill up the administration user details, you will need this to login to OpenCart admin panel –
Installation complete –
If everything went fine, you will see following screen. Well done! you are ready to sell your product ?
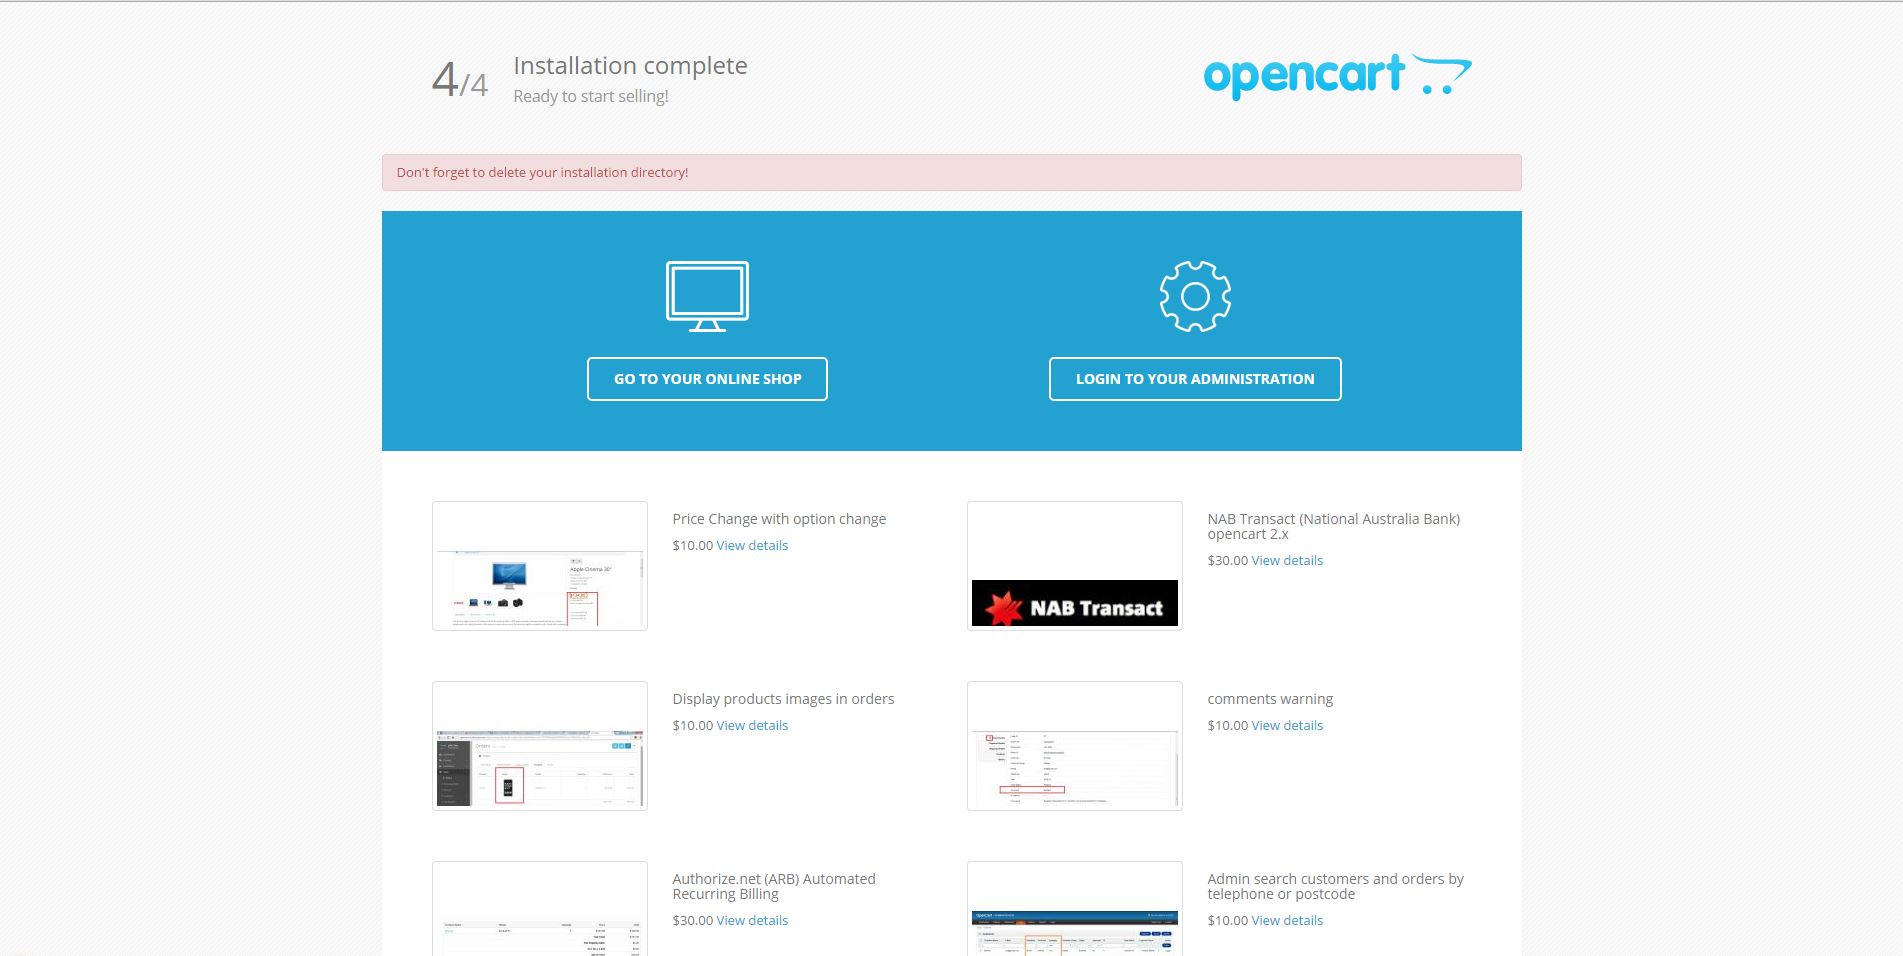
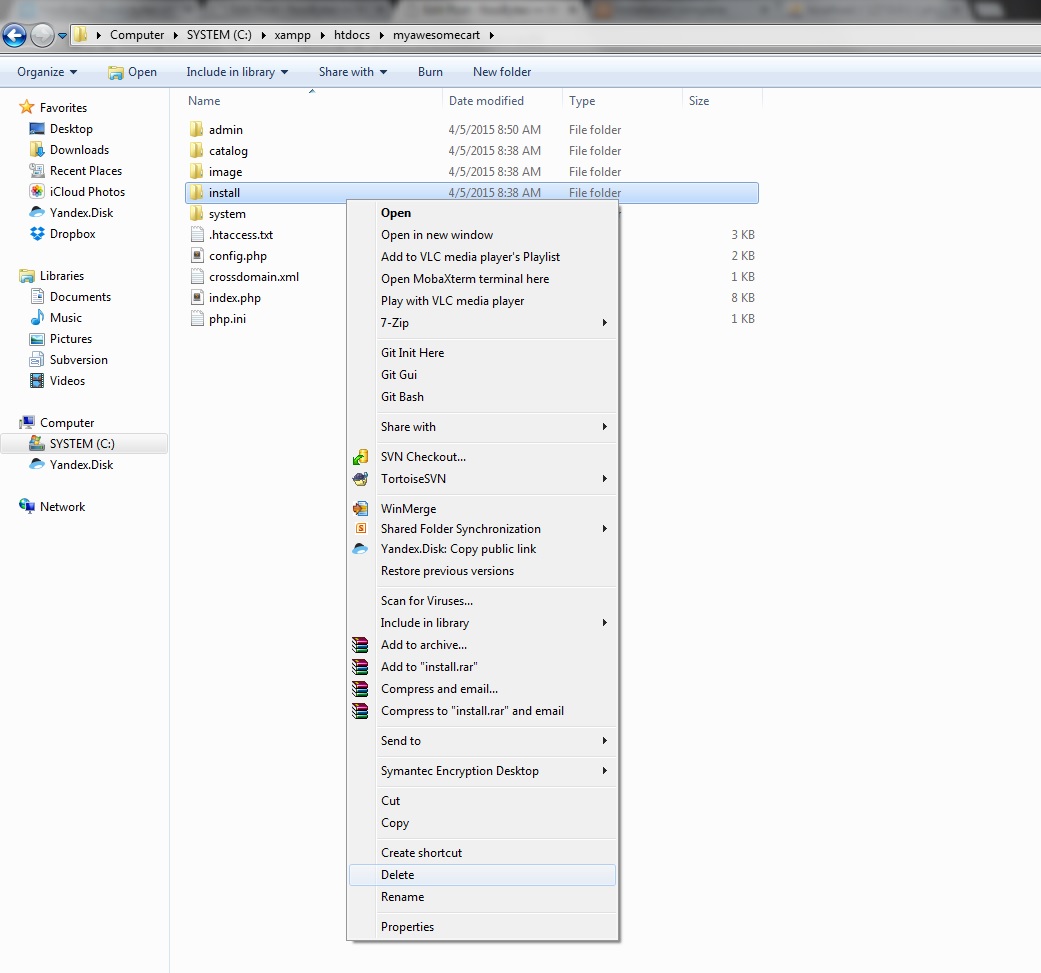
you will see a red bar on the top saying “Don’t forget to delete your installation directory!” Go to your “myawesomecart” folder and delete installation directory –
Installation is complete, you are ready to add products and features to your shopping cart and start selling.
5. Shopping Cart Administration
You will see two options on completion page “GO TO YOUR ONLINE SHOP” and “LOGIN TO YOUR ADMINISTRATION”. The first option will take you to the front-end store and the second one will take you to the administration panel.
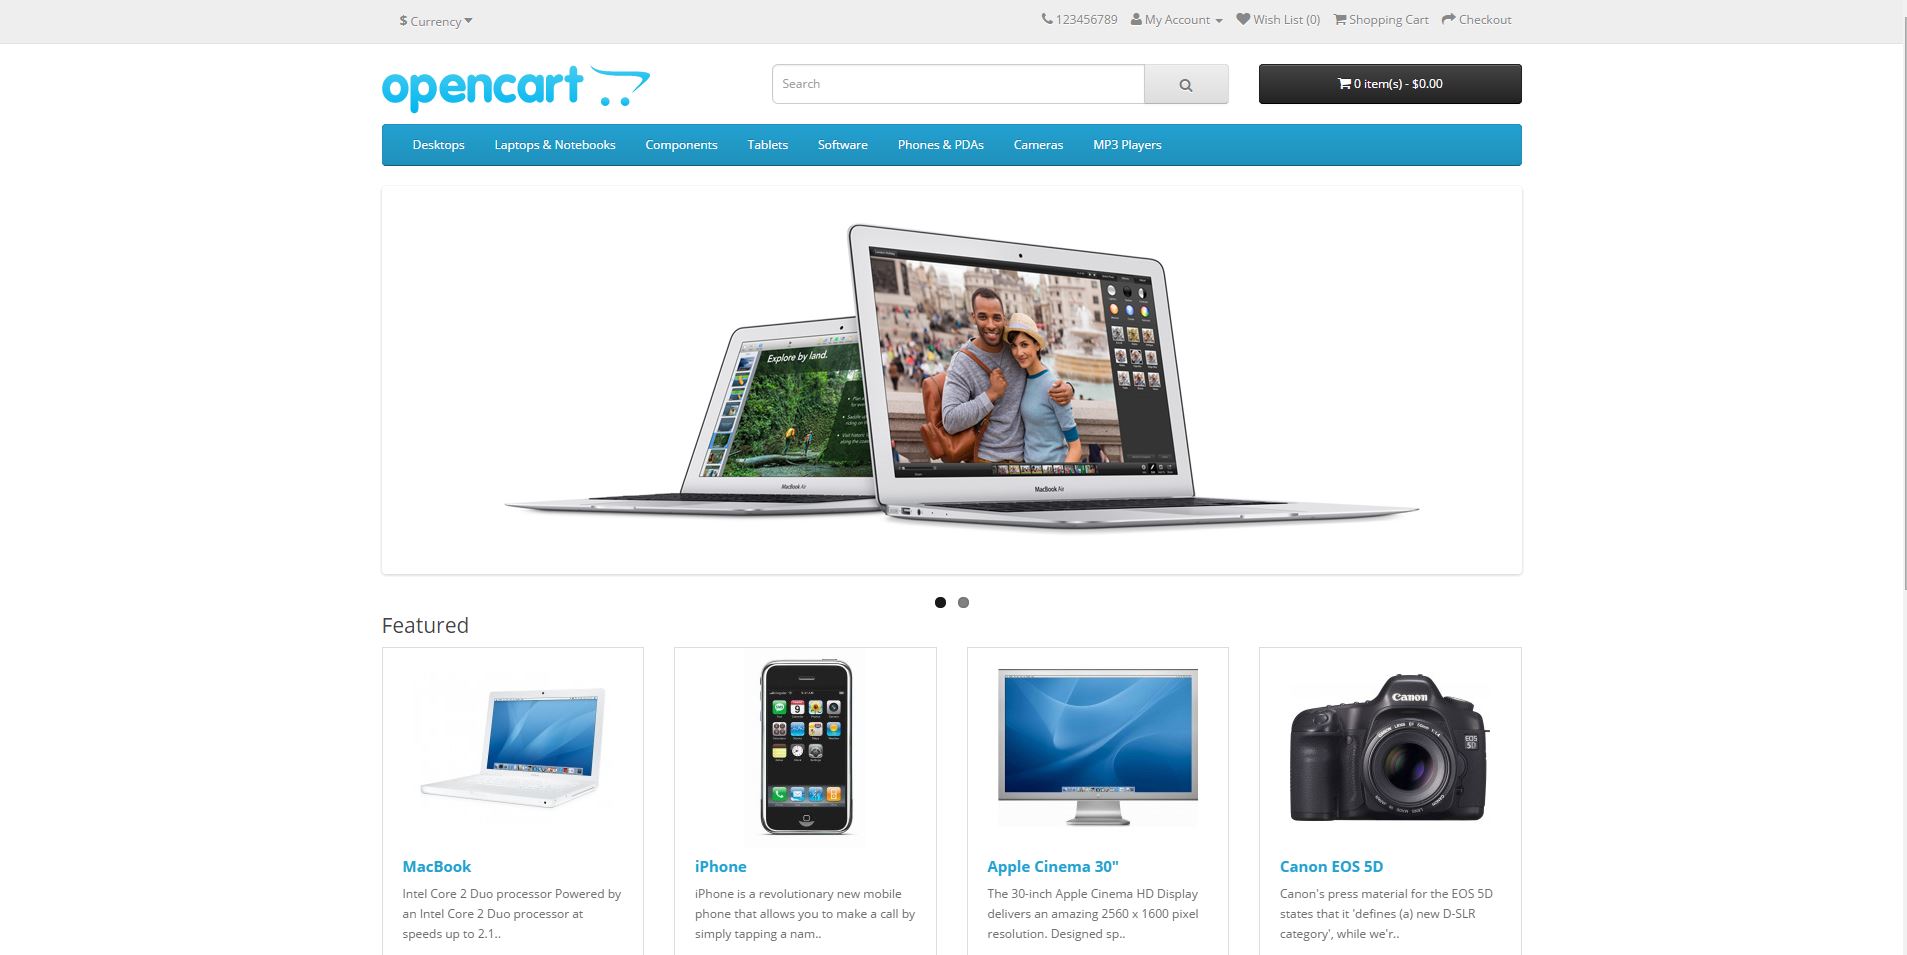
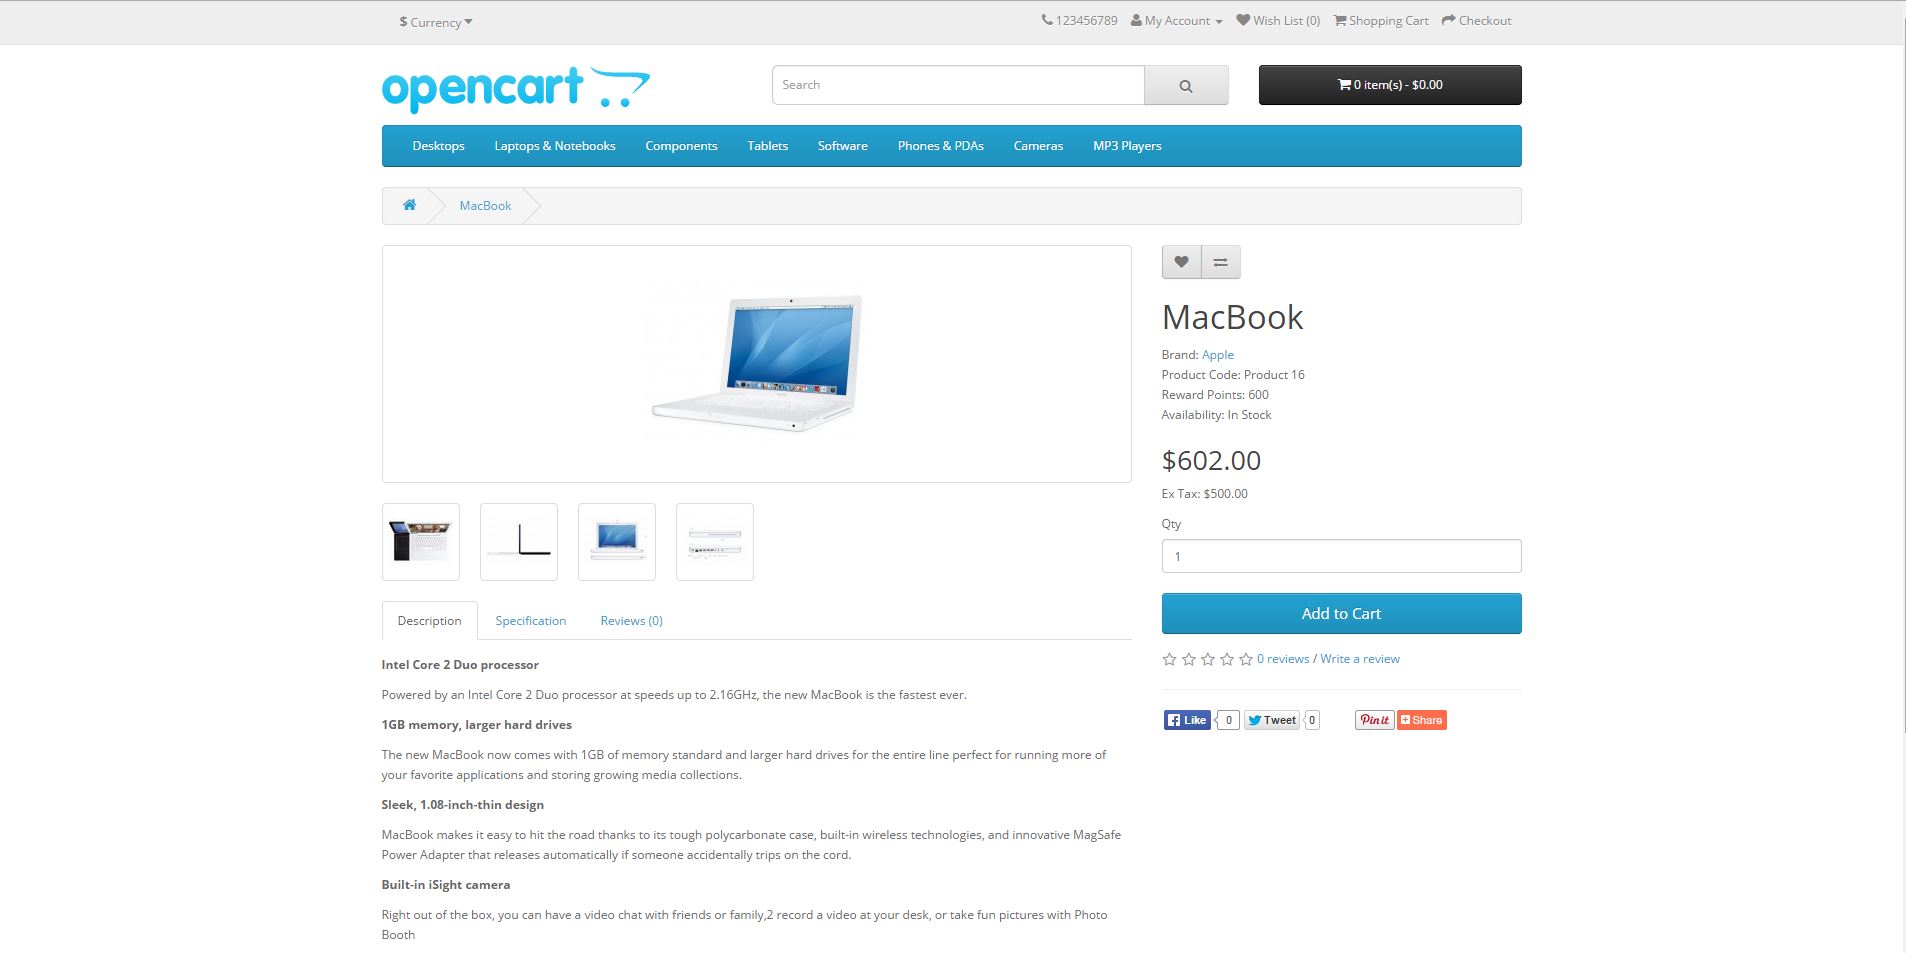
6. Manage Product detail page and Store Front-End
This is the front-end of your shopping site where people can browse, add items to cart and purchase them.
7. Take a look at Site Administration –
You will a need way to manage your shopping cart which includes- customise design and layout, managing product, categories, cart, customers, orders, modules etc. You can login to admin panel using http://localhost/myawesomecart/admin and entering the credential of admin you created in installation step
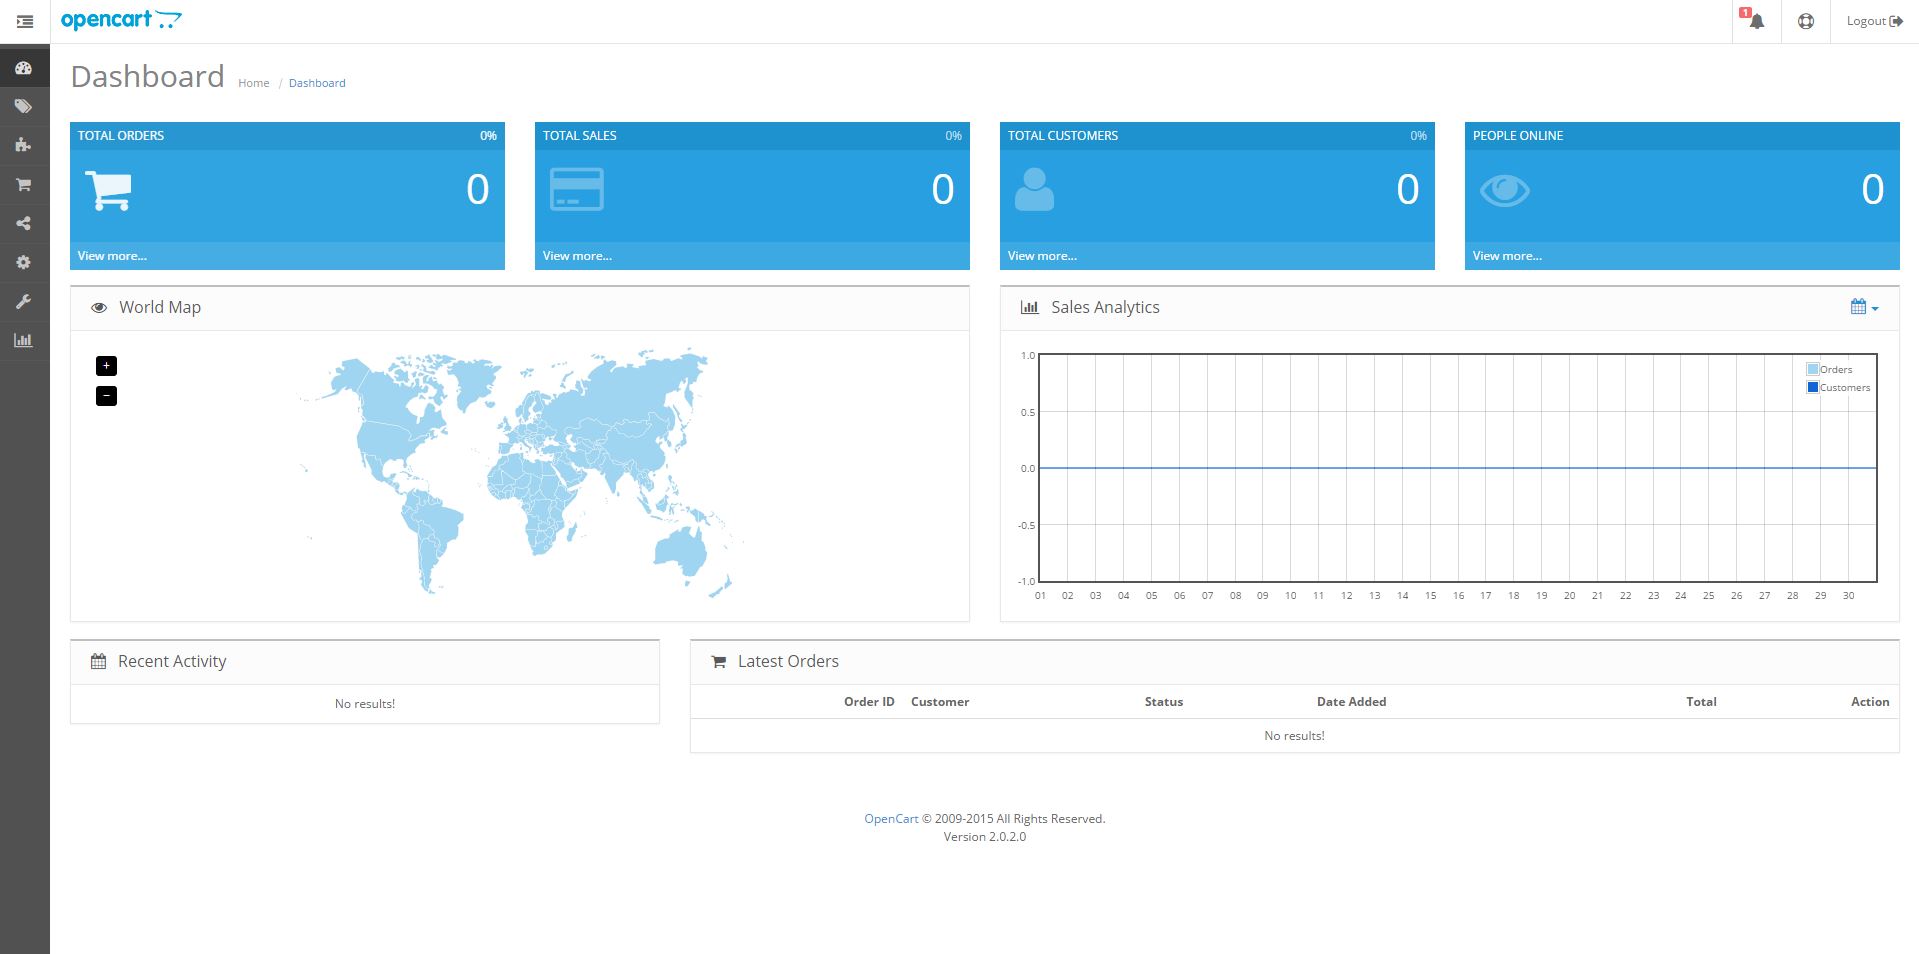
Administration is very powerful and provides extension based features which you can easily plug to your cart. Complete guide on administering OpenCart is out of scope of this article but here are some useful resources that will help you build your shopping cart even further and in a very powerful way